Tire balancing ensures that your vehicle’s tires spin smoothly and evenly, reducing vibrations and extending their lifespan. In this blog post, we will guide you through the process of tire balancing, providing step-by-step instructions, gathering the necessary tools and equipment, and preparing your vehicle for the task.
We will also delve into the benefits of DIY tire balancing at home, the importance of testing the balance, and making necessary adjustments. However, safety is paramount, so we will highlight some important safety considerations to keep in mind while performing this task.
Understanding Tire Balancing And Its Importance
Tire balancing is a crucial aspect of vehicle maintenance that often goes overlooked by many car owners. Achieving proper tire balance is essential for various reasons, including enhancing driving comfort, promoting evenly distributed tire wear, and improving overall vehicle handling. When tires are not balanced correctly, it can lead to vibrations, uneven tire wear, and even potential safety hazards. In this blog post, we will delve into the importance of tire balancing, its benefits, and how to achieve balance at home.
Why is tire balancing important?
Proper tire balance plays a significant role in maintaining a smooth and comfortable ride. When a tire is out of balance, it can cause vibrations in the steering wheel, seat, and floorboards, making your driving experience unpleasant. These vibrations can also impact other parts of the vehicle, such as the suspension and steering system, leading to premature wear and tear. By ensuring that your tires are correctly balanced, you can minimize these vibrations and prolong the lifespan of your tires and other vehicle components.
How to balance a tire at home?
While it is recommended to have your tires balanced by a professional, it is possible to perform tire balancing at home with the right tools and equipment. The first step is to gather the necessary tools, such as a jack, lug wrench, wheel weights, and a tire balancer. Once you have assembled the tools, it is essential to prepare the vehicle by safely lifting it and removing the wheels. Next, you can proceed with the step-by-step instructions for tire balancing, which involve inspecting the tire for any damage, cleaning the wheel, and attaching wheel weights to achieve balance. Finally, it is crucial to test the balance and make any necessary adjustments to ensure optimal results.
The benefits of DIY tire balancing at home
Opting for DIY tire balancing at home can have several advantages. Firstly, it allows you to save both time and money by avoiding visits to an auto repair shop. Additionally, performing tire balancing on your own gives you complete control over the process and enables you to ensure the job is done correctly. Furthermore, implementing regular tire balancing as part of your vehicle maintenance routine can help extend the life of your tires, promote fuel efficiency, and provide a safer driving experience overall.
Tire Balancing Equipment
| Tool | Description |
|---|---|
| Jack | A device used to lift the vehicle off the ground |
| Lug wrench | A specialized tool for removing lug nuts |
| Wheel weights | Metal weights attached to the wheel to achieve balance |
| Tire balancer | A device used to measure the imbalance of the tire |
Gathering The Necessary Tools And Equipment
Before you begin balancing your tires at home, it’s important to gather all the necessary tools and equipment. Tire balancing requires a few specific tools that will help you achieve accurate results. Firstly, you will need a tire balancer machine or a tire balancing stand. This equipment is essential for accurately assessing the weight distribution of your tires. Additionally, you will need a jack to lift the vehicle and a wheel weight hammer to add or remove weights from the wheels.
In addition to these tools, you should also have a tire pressure gauge to ensure that your tires are properly inflated before balancing. A tire tread depth gauge is also recommended to check the condition of your tires. It’s important to have a lug wrench or a tire iron to loosen and tighten the lug nuts. Finally, it’s a good idea to have a cleaning brush or sponge to remove any debris or dirt from the wheels and tires.
Once you have gathered all the necessary tools and equipment, you will be ready to proceed with the tire balancing process. These tools are essential for ensuring that your tires are balanced correctly, resulting in a smooth and safe ride. Without the proper tools, it may be difficult to achieve accurate balance, leading to potential issues such as uneven tire wear or vibrations while driving. Therefore, investing in these tools is crucial for maintaining the performance and longevity of your tires.
| Tools and Equipment | Usage |
|---|---|
| Tire balancer machine or tire balancing stand | To accurately assess weight distribution |
| Jack | To lift the vehicle |
| Wheel weight hammer | To add or remove weights from the wheels |
| Tire pressure gauge | To check tire inflation |
| Tire tread depth gauge | To assess tire condition |
| Lug wrench or tire iron | To loosen and tighten lug nuts |
| Cleaning brush or sponge | To remove debris from wheels and tires |
Gathering the necessary tools and equipment is the first step towards successfully balancing your tires at home. Ensuring that you have all the required tools will make the process easier and more effective. By investing in these tools, you can maintain the optimal performance and longevity of your tires, resulting in a smoother and safer driving experience.
Preparing The Vehicle For Tire Balancing
Preparing the Vehicle for Tire Balancing is an essential step to ensure the longevity and optimal performance of your tires. Before diving into the process of balancing your tires, it is important to gather all the necessary tools and equipment to make the task more efficient and effective.
Firstly, you will need a jack and jack stands to safely lift and secure your vehicle. This will allow you to access the tires more easily and provide a stable work environment. It is crucial to follow proper safety precautions when using the jack and jack stands to avoid any accidents or injuries.
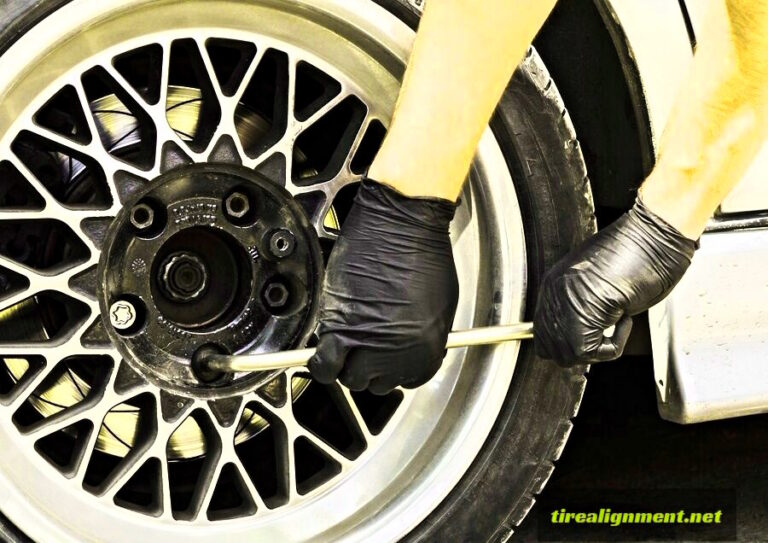
Secondly, you should prepare a lug wrench or a tire iron to loosen the lug nuts on the wheels. This tool will allow you to remove the wheels from the vehicle in order to access the tires for balancing. Make sure the lug wrench fits the size of the lug nuts to ensure proper functionality.
Additionally, having a torque wrench is important to properly tighten the lug nuts after the tire balancing process. This will ensure that the wheels are securely attached to the vehicle, minimizing the risk of accidents caused by loose or improperly tightened lug nuts.
- Jack and jack stands
- Lug wrench or tire iron
- Torque wrench
| Tools and Equipment | Description |
|---|---|
| Jack and jack stands | Used to safely lift and secure the vehicle, providing access to the tires. |
| Lug wrench or tire iron | Used to loosen the lug nuts on the wheels for removing them from the vehicle. |
| Torque wrench | Used to properly tighten the lug nuts on the wheels after tire balancing. |
By having these essential tools and equipment at hand, you will be well-prepared and equipped to proceed with the tire balancing process. It is important to familiarize yourself with the proper use and handling of these tools, ensuring your safety and the effectiveness of the tire balancing procedure.
Step-By-Step Instructions For Tire Balancing
Tire balancing is an essential maintenance task that ensures a smooth and safe ride for your vehicle. When tires are not properly balanced, it can lead to various issues such as uneven tread wear, vibrations, and even decreased fuel efficiency. While many car owners prefer to take their vehicles to a professional tire shop for balancing, it is possible to balance a tire at home. In this blog post, we will provide you with step-by-step instructions on how to balance your tires from the comfort of your own garage.
Before you begin balancing your tires, it is important to gather the necessary tools and equipment. You will need a tire balancing machine, which can be purchased or rented from an auto parts store. Additionally, you will need a jack and jack stands to lift your vehicle off the ground, as well as a tire pressure gauge to ensure that your tires are inflated to the correct pressure. It is also recommended to have a wheel weight removal tool on hand in case you need to adjust the balance of your tires.
Once you have gathered all the necessary tools, you can begin preparing your vehicle for tire balancing. Start by parking your car on a flat and level surface. Engage the parking brake and place wheel chocks behind the tires to prevent the vehicle from rolling. It is also a good idea to loosen the lug nuts on each tire before lifting the vehicle with the jack. This will make it easier to remove the tires later on. Once you have completed these steps, you are ready to move on to the actual tire balancing process.
Testing The Balance And Making Adjustments
When it comes to tire balancing, testing the balance and making adjustments is a crucial step in ensuring a smooth and safe ride. A properly balanced tire can improve performance, extend tire life, and prevent uneven tread wear. In this blog post, we will discuss the importance of testing tire balance and provide step-by-step instructions on how to make adjustments if necessary.
Testing the balance:
Before making any adjustments, it is important to test the balance of your tires. Start by placing the wheel and tire assembly on a balancer, ensuring that it is securely fastened. The balancer will detect any imbalances by measuring the distribution of weight around the tire. It will then display the amount and location of any imbalance.
Making adjustments:
If the balancer indicates that adjustments are needed, there are several methods you can use to correct the balance. One common method is by adding wheel weights to certain areas of the rim. These weights come in various sizes and can be attached to the rim using adhesive or clips. By strategically placing the weights in the specified locations, you can counterbalance the weight distribution and achieve a balanced tire.
Another method for making adjustments is by adjusting the tire’s positioning on the rim. This is done by rotating the tire slightly and reseating it on the rim. By experimenting with different positions, you can find the optimal placement that achieves a balanced tire. It is important to note that this method may not be suitable for all tire types, so it is best to consult a professional if you are unsure.
Final testing:
Once you have made the necessary adjustments, it is crucial to perform a final test to ensure the tire is properly balanced. Place the wheel and tire assembly back on the balancer and check if the imbalance has been corrected. If the balancer indicates that the tire is now balanced, you can proceed with reinstalling the tire on your vehicle. However, if the imbalance persists, it may be necessary to repeat the adjustment process or seek the assistance of a professional tire technician.
| Key Steps | Description |
|---|---|
| 1 | Place the wheel and tire assembly on a balancer. |
| 2 | Read the balancer to determine any imbalances. |
| 3 | Add wheel weights or adjust the tire’s positioning as needed. |
| 4 | Perform a final test to ensure the tire is properly balanced. |
In conclusion, testing the balance and making adjustments are essential steps in the tire balancing process. By carefully following the steps outlined in this blog post, you can ensure that your tires are properly balanced, resulting in a smoother ride and improved overall performance. However, if you are unsure or uncomfortable performing this task yourself, it is always recommended to seek the assistance of a professional tire technician for optimal results.
Benefits Of Diy Tire Balancing At Home
When it comes to maintaining your vehicle, one important aspect that should never be overlooked is tire balancing. Understanding tire balancing and its importance is essential in ensuring a smooth and comfortable ride while also extending the lifespan of your tires. While you can always take your car to a professional for tire balancing, there are also benefits of doing it yourself at home.
One of the primary benefits of DIY tire balancing at home is the cost-effectiveness. By balancing your own tires, you eliminate the need to pay for professional services, which can add up over time. Additionally, you have the freedom to choose the tools and equipment that best suit your needs and budget.
Another advantage is the convenience of being able to balance your tires whenever and wherever you want. Instead of having to schedule an appointment and wait for your turn at the mechanic, you can simply do it at home whenever it is most convenient for you. This not only saves time but also provides a sense of satisfaction and self-reliance.
Important Safety Considerations For Tire Balancing
Tire balancing is a crucial maintenance task that ensures smooth and safe driving experience. While it is possible to balance tires at home, it is essential to prioritize safety to prevent accidents and injury. Here are some important safety considerations to keep in mind when performing tire balancing at home.
- Protective Gear: It is imperative to wear appropriate protective gear before starting the tire balancing process at home. This includes safety glasses, gloves, and sturdy footwear to protect yourself from any potential hazards.
- Secure Workspace: Create a safe and secure workspace for balancing tires. Ensure there is enough space to maneuver around without any obstructions. A flat and level surface is ideal, providing stability and preventing accidents.
- Vehicle Stability: Before starting the balancing process, ensure the vehicle is parked on a stable surface. Use wheel chocks or blocks to prevent the vehicle from rolling or moving during the balancing procedure.
| Tools and Equipment: | Maintenance Tips: |
|---|---|
|
|
|
|
|
|
When performing tire balancing, it is essential to carefully follow the manufacturer’s instructions and guidelines. Each vehicle may have specific balancing requirements, and neglecting these instructions can lead to improper balance and potential safety hazards. Additionally, if you encounter any difficulties or uncertainties during the process, it is recommended to consult a professional technician for assistance.
Remember, safety should always be your top priority when conducting any DIY maintenance tasks at home. By adhering to these important safety considerations, you can ensure a secure and successful tire balancing experience.
Frequently Asked Questions
1. Why is tire balancing important?
Tire balancing is important because it ensures even weight distribution among all the tires, which improves the overall performance and extends the lifespan of the tires, reduces vibrations, and provides a smoother and safer ride.
2. What tools and equipment do I need for tire balancing?
You will need a tire balancing machine, wheel weights, a valve stem tool, an air compressor, and a torque wrench to properly balance your tires.
3. How do I prepare my vehicle for tire balancing?
Before balancing the tires, make sure your vehicle is parked on a level surface, the engine is off, the parking brake is engaged, and the wheels are securely chocked to prevent any movement.
4. What are the step-by-step instructions for tire balancing?
The steps for tire balancing include removing the wheel from the vehicle, mounting it on the balancing machine, measuring the imbalance, applying wheel weights to correct the imbalance, and reattaching the wheel to the vehicle.
5. How do I test the balance of the tires and make adjustments if needed?
You can test the balance of the tires by taking the vehicle for a test drive and observing any vibrations or pulling to one side. If adjustments are needed, you can add or remove wheel weights until the tires are properly balanced.
6. What are the benefits of DIY tire balancing at home?
DIY tire balancing at home not only saves you money but also allows you to have control over the entire process. It gives you the opportunity to learn valuable skills, ensures your tires are properly balanced, and provides a sense of accomplishment.
7. What are some important safety considerations for tire balancing?
When performing tire balancing, it is important to wear safety goggles, gloves, and follow the manufacturer’s instructions for the equipment. Additionally, ensure the vehicle is securely supported, and never exceed the recommended weight limits for wheel weights.